
Have you ever wondered how the cool cats of the internet make Markdown checklists in their GitHub repositories, issues, and pull requests? Me too. And I’m here to say: you too can be a cool cat.
Markdown checklists are handy for visualizing tasks that need to be done. Beyond that, GitHub can turn these checklists into task lists in your issues and pull requests to make your project tracking easier and better. Let’s learn how to make ‘em!
How to create a checklist in Markdown
Making a checklist is exactly like making a regular list in Markdown (a - starting each line), but you add [ ] or [x] after the -, like so:
A regular list:
- This is a list item
- This is another list item
A checklist:
- [ ] This is an unchecked item
- [x] This is a checked item
When the checklist is rendered, it looks like this:

Feel free to use the short Markdown checklist template above to get a list going for yourself.
Markdown checklists are a great way to keep track of tasks in your README files. For example, you could mark down which features might be missing or which aspects of your project need contributors. You can also use these checklists for documentation (like for noting docs coverage), notes, issues, or pull requests.
The best part: GitHub adds extra functionality to your Markdown checklists — and I’ll get to that right…now!
From checklist to task list
A task list on GitHub is a glorified Markdown checklist, allowing you to do even more project planning and tracking when it’s in an issue or pull request.
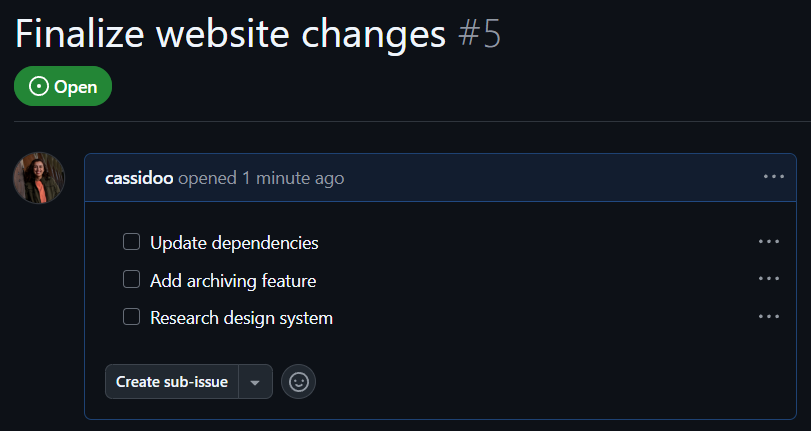
For example, let’s say you make an issue to add some features to a project of yours, like so:
- [ ] Update dependencies
- [ ] Add archiving feature
- [ ] Research design system
It will render like this in the issue:
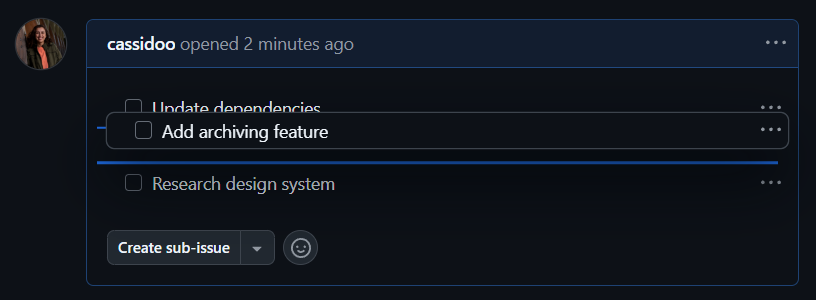
It might look like a normal checklist, but if you hover over one of the bullet points, you’ll be able to drag and drop each task to re-order them:
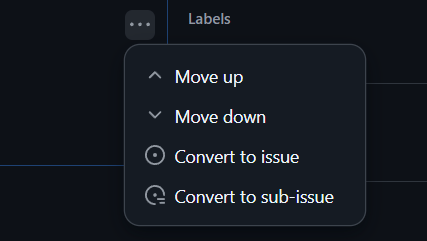
Or, if you hit the ... menu on the right side, you can turn each of the individual checklist items into its own issue, sub-issue, or re-order from there!
Turning those checklist items into issues and sub-issues means that you can turn that planned work into tracked tasks. Breaking down your existing issues into smaller pieces might seem daunting, but doing it in this way connects all the pieces together nicely as you break things up into more specific chunks.
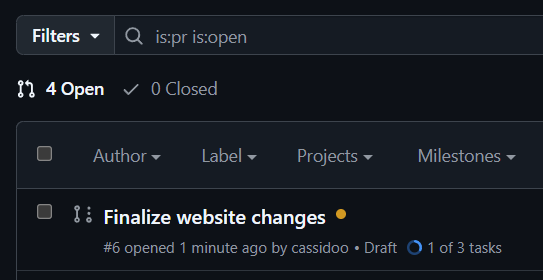
And let’s just say you did the exact same thing, but in a pull request. You still have the ability to re-order the tasks, and it will render the same way as it does in the issue:
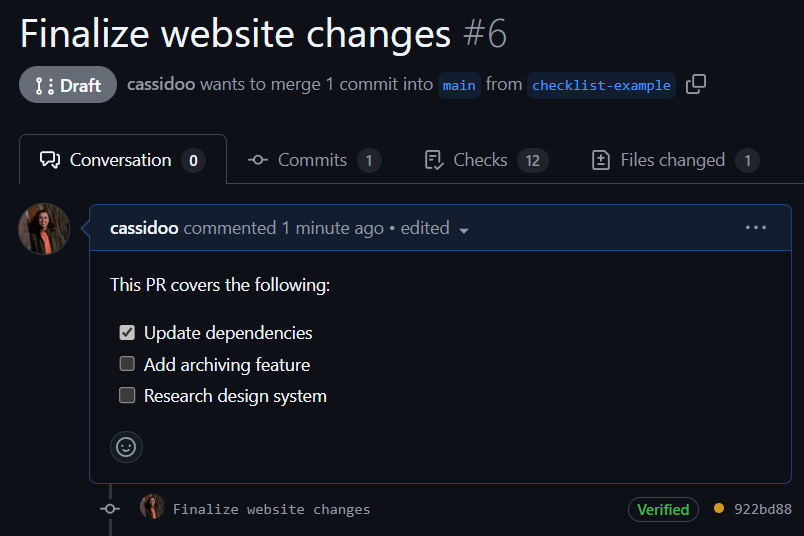
But now, because you’ve built this checklist in the pull request, you get more visibility into how many tasks have been completed and how many remain in the list of pull requests for your repository. Look just below the title of your pull request: You can see the status of your project right there!
Where can I learn more?
Love that you asked that question. Good job. Head over to the GitHub Docs to learn more about task lists on GitHub.
Happy coding!
The post Video: How to create checklists in Markdown for easier task tracking appeared first on The GitHub Blog.
Ever wondered how to create checklists in your GitHub repositories, Issues, and PRs? Make task lists more manageable in your GitHub repositories, issues, and pull requests.
The post Video: How to create checklists in Markdown for easier task tracking appeared first on The GitHub Blog.


Social Plugin